Play in the Marathonbet app for Android
To download the app, follow all the steps in the instructions. It’ll only take a few minutes.
Please note: You can only change your region if there are no active or trial subscriptions to Apple services or products. If you have any such subscriptions, you must cancel them in order to change your region. This may lead to your data being lost.

3 Steps to Install the App
1. Changing region
2. Installing the application
3. Reverting to your initial settings
-
Install the App in six steps
-
Setting up your Apple ID in the App Store
1.1.1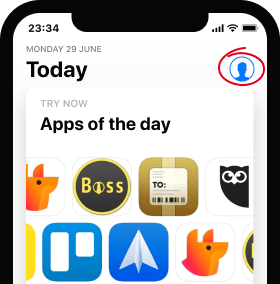 Go to the App Store and tap on your profile picture1.1.2
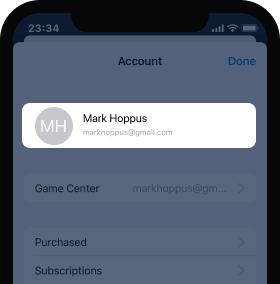 Tap “Apple ID”1.1.3
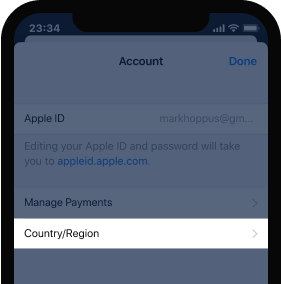 Tap “Country/Region”1.1.4
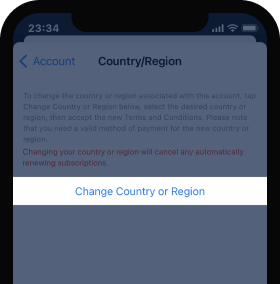 In the window that opens, tap “Change Country or Region”1.1.5
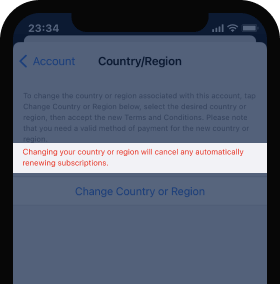 Your subscriptions will be resumed automatically once you change back to your initial region
 -
Changing region
1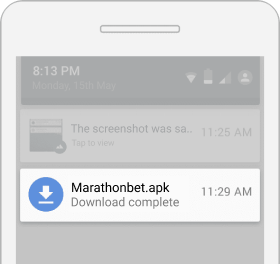
Download the app
Leave the downloaded file in the notification bar for now!2
Open your device’s settings
The icon can differ from the one in the image.3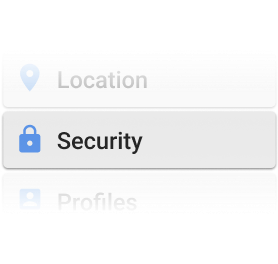
Select ‘Security’ in the settings
The icon can differ from the one in the image. -
Entering your details
4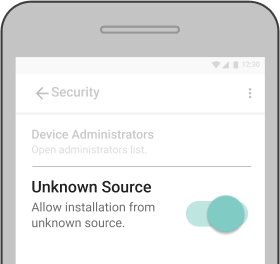
Authorise the installation
Tap ’Unknown Source’. ‘Unknown Source’ means that you authorise the installation of an app that’s not from the Google Play Store.5
Go back to the downloaded app
Go back to the notifications (shown in Step 1) and tap on the notification from Marathonbet. This will start the installation process. The app can also be found in the ‘Downloads’ folder on your device.6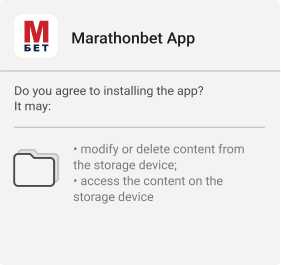
Allow access
Tap ‘Install’. Allow the app to perform the process. This will allow you to install the app on your phone.
-
-
The app will then be ready to use.
-
Reverting to your initial settings
Enable all your automatically renewing subscriptions. To do that, return your initial region in Apple ID settings of the App Store.
-
Setting up your Apple ID in the App Store
3.1.1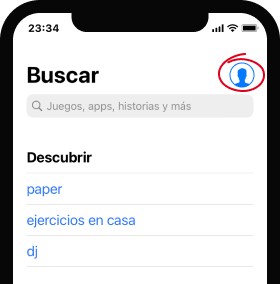 Go to the App Store and tap on your profile picture3.1.2
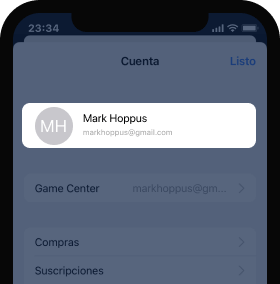 Tap “Apple ID”3.1.3
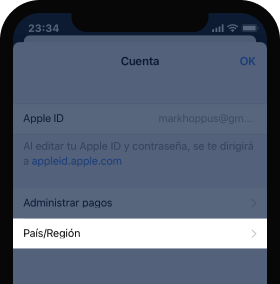 Tap “País/Región”3.1.4
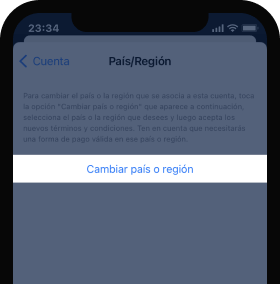 In the window that opens, tap “Cambiar pais o region”
 -
Changing region
3.2.1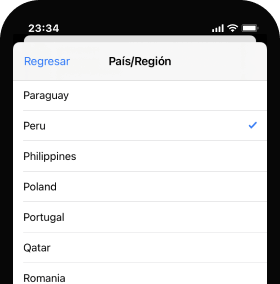 Your subscriptions will be resumed automatically once you change back to your initial region3.2.2
 Agree to the Terms and Conditions3.2.3
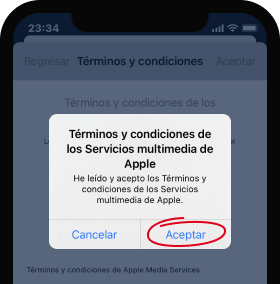 Confirm your consent in the pop-up window
 -
Entering your details
Once you confirm your new region, you will see a window with the payment methods information.
3.3.1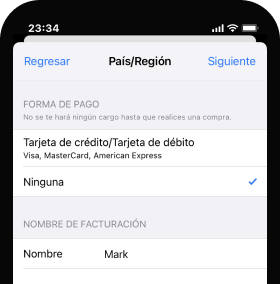 Enter your details into the required fields3.3.2
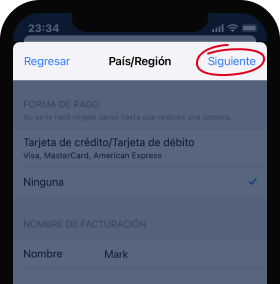 Tap “Siguiente” (Next)
You have successfully changed back to your initial region settings. Now, all your subscriptions will be renewed automatically.
-